|
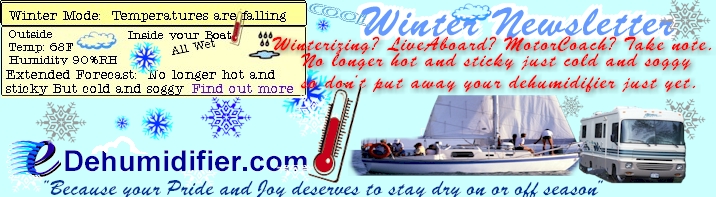
1. Beating Condensation and Staying Dry this Winter in your
boat or RV.
|
The Challenge: Staying Dry The Culprit: Condensation
|
Search the Web For Additional Products and
Resources, Supplies, Parts and Accessories covered in this article by
Vendor:
|
The Solution: Three steps to beating condensation
in your boat or RV and staying dry this winter.
For many in the Northern Temperate Climates this is the off season. Boats
and RVs have been winterized and tucked away for the winter. But for many of you there is no off season. I'm talking about those of you in Live Aboards, Houseboats,
and Motor Homes. Even in the South: Miami, Houston, New Orleans Winter means
mild weather. What to do? For starters don't put away your dehumidifiers
just yet. Keep them running, especially if you plan on spending time
in your boat or motor coach during the milder season.
Condensation is the biggest problem during the winter season. With the mild temperature comes increased condensation.
Moisture on cooler surfaces means more condensation. Humidity condenses on cold
surfaces and makes everything soggy. You are no longer hot and
sticky anymore, just cold and soggy. At risk are liveaboards,
houseboats, and motor coach owners.
3 Steps to reducing condensation during mild weather.
1. For a quick, short term fix, use vents and exhaust
fans to vent humid air from cooking, washing and bathing to the outside.
If you don't have vents or exhaust fans, throw a window or hatch open to let in
less humid, fresh air. Sure the outside air is cold and you will
loose some heat, but the short time trade off of warmth vs. condensation
is well worth it.
2. For a
long term fix use a marine dehumidifier to reduce condensation.
The dehumidifier will work steadily in the background at reducing the
humidity in the air in your houseboat, motor coach, or live aboard.
3. Even with best humidity reduction results and
a heating system, your living space must still remain livable, so your
humidity levels will still hover around 35%RH. Therefore you will
still experience some condensation. Windows, hull, walls, hatches
are prone to condensation. Use water absorbent products such
as water snakes, sausages, water eaters (Mr. Thirsty) to absorb
condensation runoff from the base of these areas and on window sills.
These absorbent materials are available at your marine store or home
improvement or janitorial supplies store. Towels or paper towels
will work too. The important thing is to reduce condensation on
surfaces and to dry these out regularly (especially wood) to avoid mold
and mildew build up and rot down the road.
2.
What if a forced air central heating system or other heating
system for your boat or RV is either too expensive to install or perhaps not
practical.
A forced air heating system works wonders for lowering
humidity, but what If a forced air central heating system or other heating
system for your boat or RV is either too expensive to install or perhaps not
practical, and electrical space heaters consume a lot of electricity, and
create fears of the potential danger associated with boat fires caused by
electrical space heaters, then consider using a dehumidifier.
3. Temperature Limitations
of our DH-10 Boat and RV dehumidifier:
 DH-10 the
Dh-10 dehumidifier will not operate properly at temperatures below 50°F.
Frosting can begin at 50°F. The
dehumidifier will definitely not operate at temperatures below 32°F.
Water freezes at 32°F so any condensation on the
coils will freeze or frost. We have tested and ran the dehumidifier in
outdoor temperatures as low as 58°F with no
problems and moisture being removed just fine. DH-10 the
Dh-10 dehumidifier will not operate properly at temperatures below 50°F.
Frosting can begin at 50°F. The
dehumidifier will definitely not operate at temperatures below 32°F.
Water freezes at 32°F so any condensation on the
coils will freeze or frost. We have tested and ran the dehumidifier in
outdoor temperatures as low as 58°F with no
problems and moisture being removed just fine.
Temperature Limitations based on humidistat:
Operating Temperature Range (efficiency based on, and limited by the nylon
ribbon sensing element in the humidistat)
50°F to 125°F (10°C to 52°C). In addition frosting begins around 50°F which
further limits the ability of the unit to remove moisture.
Note: the dehumidifier, is not recommended for
unattended operation in below 50°F temperature. Our customers around this
time (mild weather) are on liveaboards and motor homes, where the indoor
temperature is set for personal comfort, so the temperature(70°F) for them is
within allowable usage limits.
4.
What is the difference between a dehumidifier and ac unit:
The main difference between a dehumidifier and an ac unit is that the ac unit
keeps the cool air from being warmed back up again, by venting the hot air
outside and venting the cool air into
your living space, otherwise both hot and cold air neutralize each other out and
your room would never cool down and your ac unit would essentially just have
been a power hungry dehumidifier. The dehumidifier doesn't attempt
to separate cool air from hot air. Air flowing into the dehumidifier from
one end is cooled down. This cool air continues out the back, but as it
flows over the condenser it inadvertently warms back up. So your room
temperature remains the same, though, drier. Plus the dehumidifier is more
energy efficient and has humidity selection of 20%RH to 80%RH.
5. The dehumidifier uses refrigeration principles
won't this cool down my cabin even further in mild weather?
This is a concern for those of you in Live Aboards, Houseboats, and Motor Homes, with no off season you must endure mild weather and condensation. Some of you are concerned that the dehumidifier
will lower the temperature in your live aboard even more, since it operates on
the same refrigerated principles as an air conditioner unit. Relax.
We have taken room temperature readings at 70°F
at both ends of the dehumidifier and the temperature is about the same.
How is this so? This is so because damp cabin air flows over the
evaporator coils (cold) and is cooled down; true, but the same cool air
blows over the condenser (hot) coils and is heated back up again and is
exhausted back through the other end into your cabin. So your cabin temperature remains
the same, though, drier.
6. Compare our boat and RV Dehumidifier to other products for moisture
control
If you would like to compare our dehumidifiers to
other moisture control products please take a look at our
marine dehumidifier comparison charts.

7. FAQ's on winter time
dehumidifier operation and dehumidifier operation in below freezing weather.
We have several questions concerning winter time operations,
please visit our
faq's page for more information or
http://www.edehumidifier.com/support/faq.htm#20
If you want to see the complete mold prevention program, you can use to
keep your boat or RV mildew free, see our
"Mold Prevention Program for the prevention of mold and mildew growth in
your boat or RV".
For a complete mold prevention program go
here. You'll find a Dehumidifier Program for the prevention of mold
and mildew growth in your boat or RV.
see
Search the Web For Additional Products and Resources
covered in this article:

RV Winterizing
By Mark Polk
Fall is the time of year you need to decide if your camping season is
over. Parking your RV for the winter requires some preventive measures
so it will be ready to use next spring. You’ll also be glad you did it
when you don’t have costly repair bills due to the damaging results of
winter. Now the question is how do you prepare it for winter, and who
will be doing it? If you’re like me and you enjoy performing the routine
maintenance on your RV, not to mention saving a few dollars, the “who”
part is answered. As for the “how” part, this checklist is the same one
I used to make our Winterizing & Storing video. I feel it is the easiest
and most effective way to winterize your RV. Before you get started
there are a few items you will need to have. These items can be found in
most RV parts stores:
* Non-toxic RV antifreeze (the amount depends on the layout and
length of your plumbing lines. 2 to 3 gallons will normally do).
* A water heater by-pass kit, if not already installed.
* A water pump converter kit, or tubing to connect to the inlet side
of the water pump.
* Basic hand tools to remove drain plugs.
Now we can winterize the RV water system to protect it from freezing.
Be sure to read your owners manuals for unit specific winterizing
guidelines. Follow the steps below that apply to your RV.
* If you have any inline water filters remove and bypass them before
starting.
* Drain the fresh water holding tank.
* Drain and flush the gray and black holding tanks. Clean the black
tank with a wand. Lubricate the termination valves.
* Drain the water heater. CAUTION: Never drain when hot or under
pressure.
* Open all hot and cold faucets; don't forget the toilet valve and
outside shower.
* Locate and open low point drain lines. Using the water pump will
help force water out, but turn it off as soon as the system is drained.
* Recap all drains and close all faucets.
* By-pass the water heater. If you do not have a by-pass kit
installed the water heater will fill up with antifreeze before it goes
through the water lines, wasting six gallons of antifreeze.
* Install a water pump converter kit, or disconnect the inlet side of
the pump (the line coming from the fresh water holding tank) and connect
tubing from the pump into a gallon of RV antifreeze.
* Turn the water pump on and pressurize the system. Starting with the
closest faucet slowly open the hot and then cold valves until antifreeze
appears. Replace antifreeze jug as required.
* Repeat on all faucets from the closest to farthest away. Don't
forget the outside shower.
* Flush the toilet until antifreeze appears.
* Turn the water pump off and open a faucet to release the pressure.
Go to the city water inlet.
* Remove the small screen over the inlet and push in on the valve
with a small screwdriver until you see antifreeze. Replace the screen.
* Pour a cupful of antifreeze down each drain. Pour a few cups in the
toilet and flush into the holding tank.
* If your water heater has an electric heating element turn it off.
This will protect the element if the unit is plugged in while being
stored.
* Make sure all faucets are closed.
* Consult your owner manuals for winterizing ice makers and washing
machines.
Your RV is winterized
This checklist is a basic guide that was intended to assist you in
winterizing your RV. As with many other checklists it would be
impossible to cover every RV. It is extremely important that you read
your owner’s manuals for unit specific winterizing guidelines.
Happy Camping!
Mark
Copyright 2006 by Mark J. Polk, owner of RV Education 101
 |
 In this Issue
you will find:
In this Issue
you will find: